As I described in the previous article, EMC RecoverPoint for Virtual Machines allows replicating virtual machines with virtual machine level granularity. This solution runs in VMware virtual environments and does not depend on any specific hardware.
We need to prepare VMware environment before installing Recover Point. The prerequisites are as follows:
- Installing the RecoverPoint for VMs splitter on each ESXi host in the ESXi cluster.
- Configuring Software iSCSI Adapters on every ESXi host.
- Deploying vRPAs using OVA.
There are some prerequisites for installing the RecoverPoint for VMs splitter:
- All ESXi hosts in the cluster must have ssh enabled. Ssh is required only for the installation or removal of the RecoverPoint for VMs splitter. It may be disabled at all
other times. - Ensure that each ESXi server can be rebooted individually to complete the RecoverPoint for VMs splitter VIB installation.
- The RecoverPoint for VMs splitter requires at least 800MB of RAM per ESXi node. When the memory needs of all VMs and all vRPAs running on the ESXi have been taken into account, at least 800 MB of additional memory is required for the splitter.
- The scratch location, specified during the installation process, must point to persistent storage.
There are some prerequisites for creating vRPAs:
- VMware vCenter 5.1U1 or later with at least one registered vSphere 5.1 or 5.5.
- A copy of the Virtual RPA Open Virtualization Format file. You can download this file
from EMC Online Support. - Reserved quota for virtual system resources (CPU, memory, disk). Depends on size of infrastructure:

- Ensure network infrastructure is configured in vSphere to meet the vRPA requirements: LAN and WAN, 2 iSCSI, and software iSCSI adapter.
- 4 virtual networks (LAN, WAN, iSCSI1, iSCSI2).
- The vRPA OVA package can be deployed only from the vCenter management, not via vSphere management. This is a VMware limitation for vAPP functionality, which is used by the OVA script.
Installing the splitter on an ESXi server
- On the ESXi host, enter maintenance mode to vMotion all VMs from the ESXi server.
- Use an SSH client with secure copy protocol to copy the RecoverPoint VIB. Use the following command: scp <vib name> <username>@<ESXi host IP>:/scratch or upload to the datastore via Datastore Browser
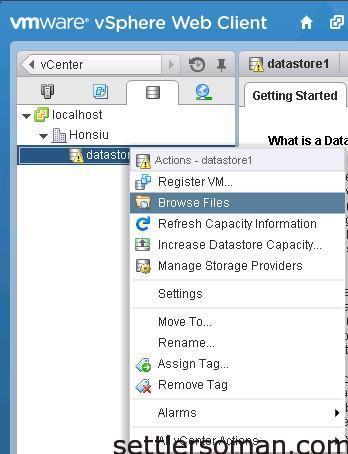

- Please log in to ESXi hosts via SSH and set the acceptance level = Community Supported. This allows the ESXi hosts to accept custom vSphere Installation Bundles (such as the RecoverPoint VIB). At the ESXCLI, enter the following command: esxcli software acceptance set --level=CommunitySupported

- To install the RecoverPoint vSphere Installation Bundle: esxcli software vib install -v path_to_the_vib.

- Reboot the ESXi server.
- Log in to ESXi host via SSH and confirm installation of the splitter: esxcli software vib list

- vMotion the virtual machines back to this ESXi server.
- Repeat the entire procedure for every ESXi server in the cluster.
Configuring the Software iSCSI Adapter
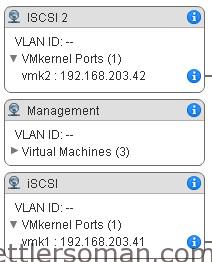
- Set up two vmkernel ports. Assign IP addresses that are on a routable subnet or on the same subnet as the vRPA iSCSI interfaces that will be assigned when deploying the
vRPA cluster. - At the vSphere Web Client, in Inventory, select Hosts and Clusters. Select an ESXi
server (host), click the Manage tab > Storage > Storage Adapters and create a software
iSCSI adapter. Add the vmkernel ports to the network configuration under the iSCSI
Software Adapter. - Click Add and confirm that you want to add the iSCSI software adapter.
- Your ISCSI adapters should look similar
Creating the first or a single vRPA
vRPAs must be created using the OVA package file. The OVA package can be deployed
only from the VMware vCenter management, not from the vSphere management.
- At the vCenter management console, from the File menu, select Deploy OVF Template.
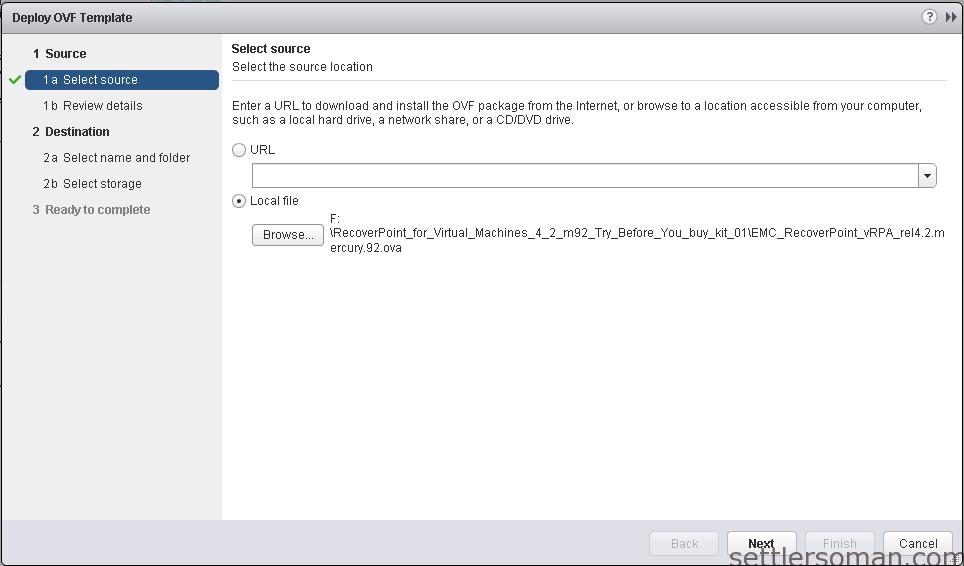
- In the Source screen, specify the vRPA OVA package location.
- In the OVF template details screen, review the general properties of this OVA template.
To accept, click Next.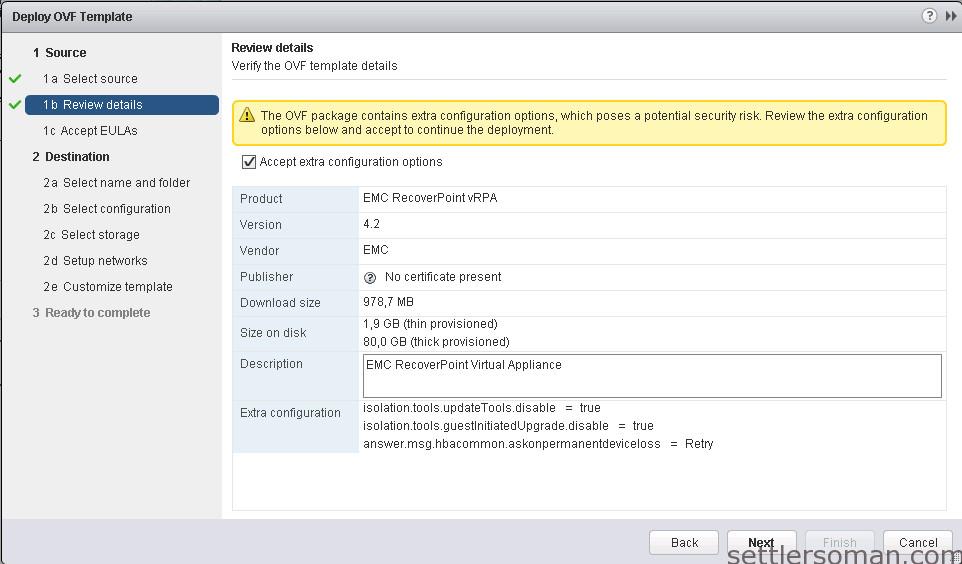
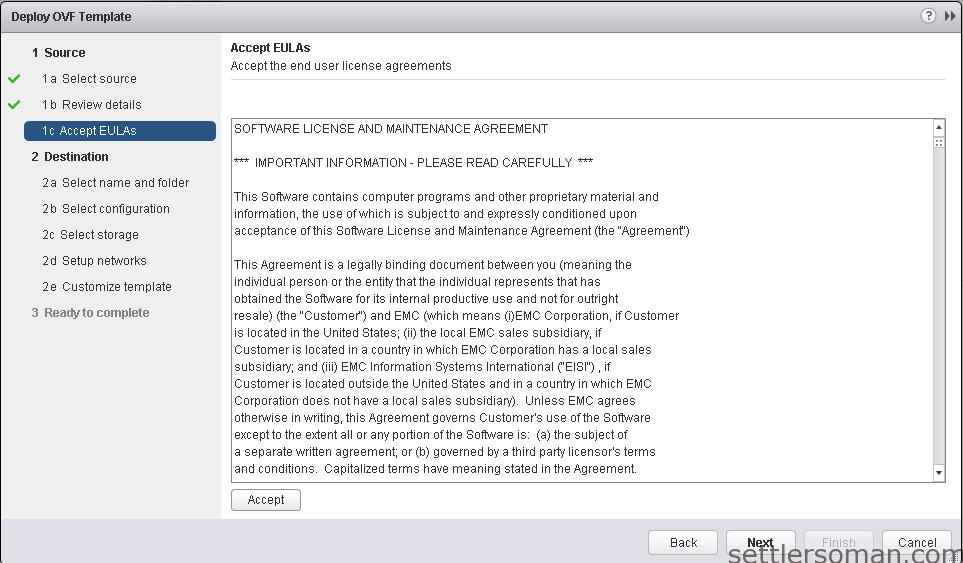
- In the EMC End-User License Agreement screen, if you accept the terms of the EMC End-User License Agreement, click Accept and Next.
- In the Name and Location screen, enter the name you wish to assign to this vRPA. If
you enter the name of an existing vRPA, you will not be permitted to continue.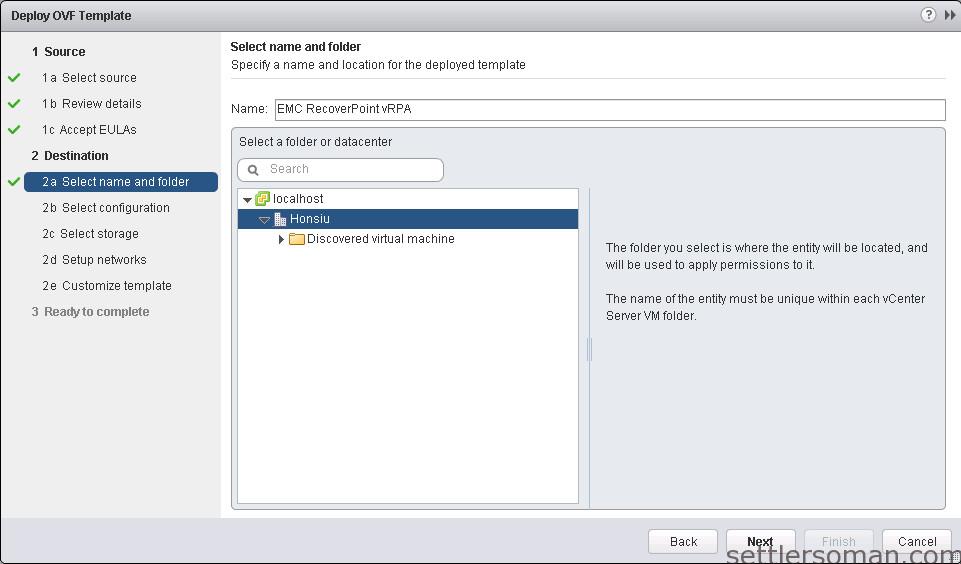
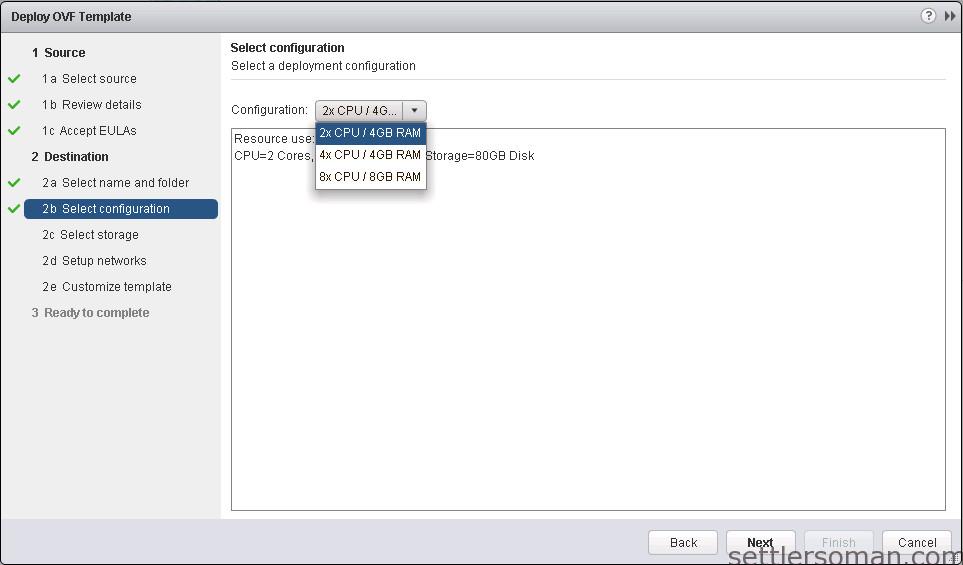
- In the Deployment Configuration screen, select the desired configuration profile
- In the Storage screen, Select the vRPA storage (datastore) that will be used to host the
vRPA virtual machine files. The best practice is to select a high-performance datastore. In the Disk Format screen, select Thin Provision or Thick Provision disk format.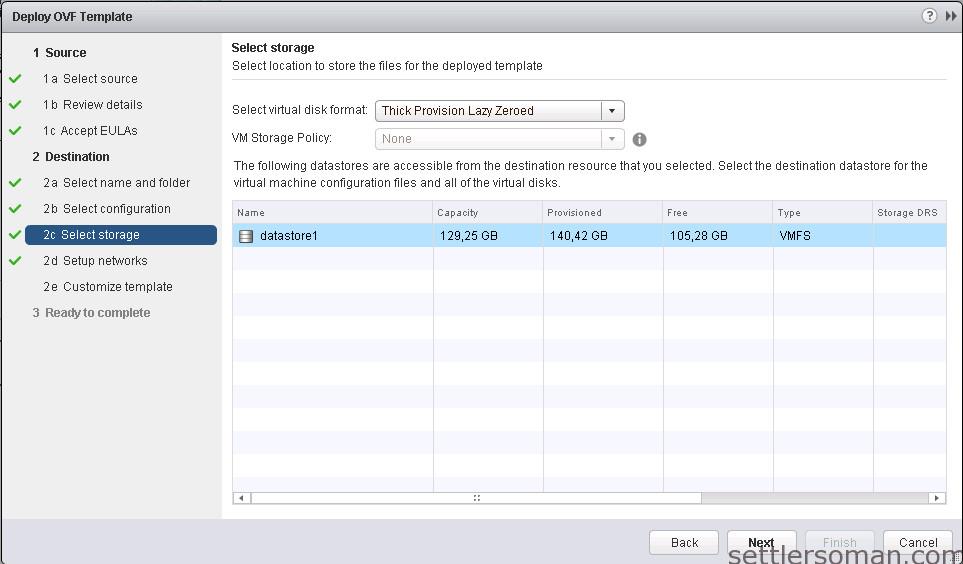
- In the Network Mapping screen, map the four required vRPA Ethernet ports (Source
Networks) to the available vSphere virtual networks (Destination Networks). Do not
select the internal VMware iSCSI network ( iSCSI Network option).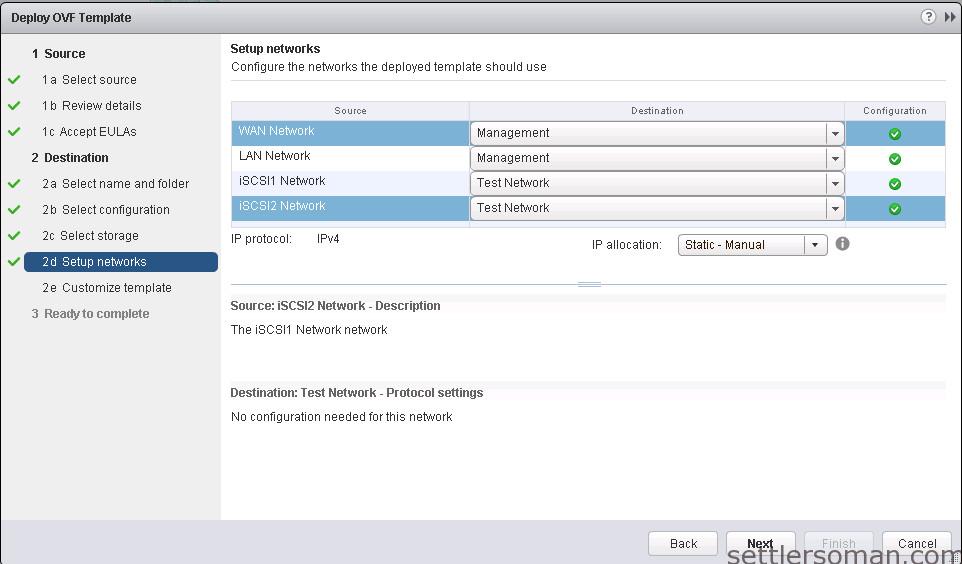
- In the IP address allocation screen, select the IP allocation policy for the vRPA
temporary IP, which will later be used to connect to the Deployment Manager. Select IP Allocations - Static. - Enter the required IP Properties.
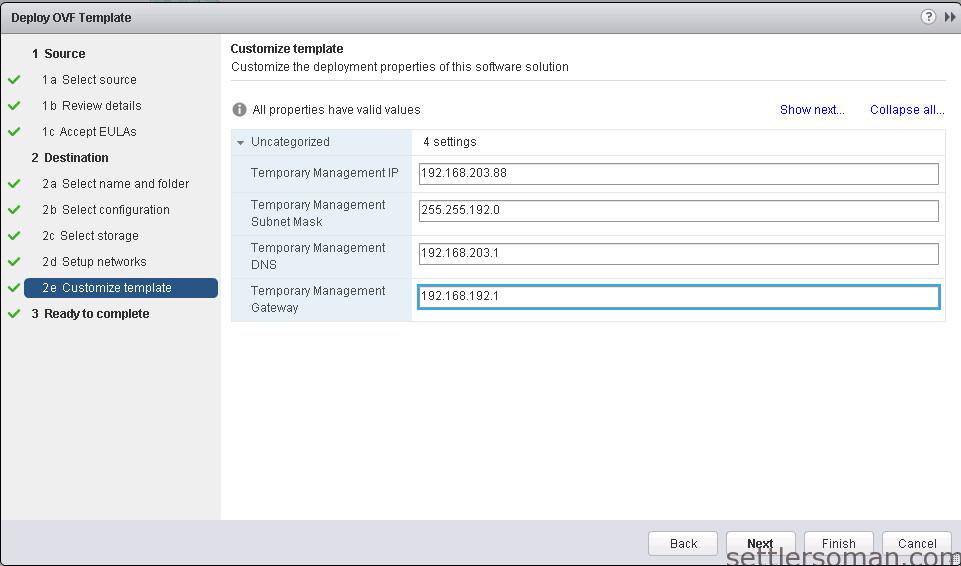
- The Ready to Complete screen summarizes all your selections. Click Finish to create
this instance of the vRPA. The Deploying vRPA appears, showing the progress.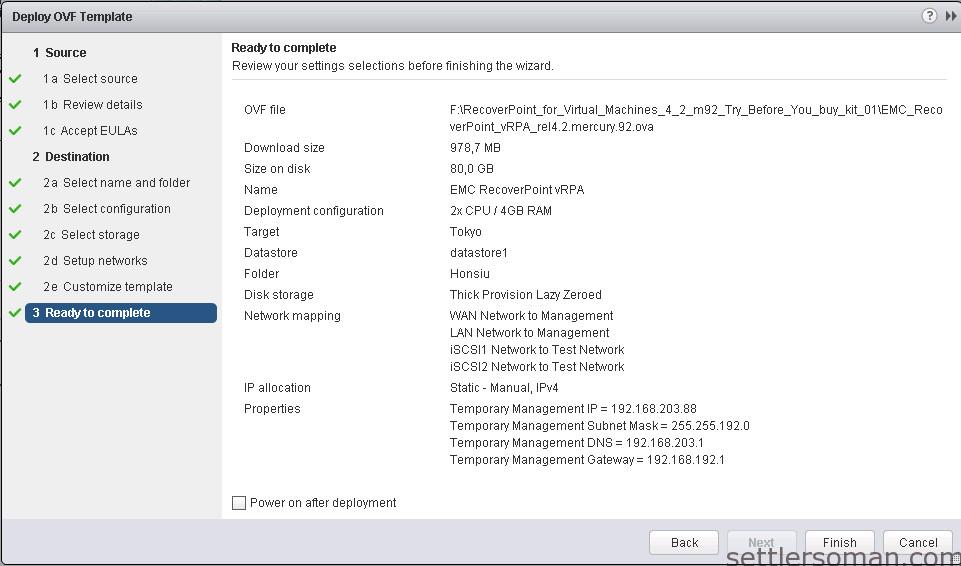
It is recommended to create vRPA cluster. So you should deploy at least 2 vRPA following steps 1-11.
Conclusion
In this article, I showed what and how to prepare VMware for deploying RecoverPoint for Virtual Machines. Please follow the next post to find out how to a vRPA Cluster.