In this article I will show how to deploy vCenter Hyperic Server 5.8.2. As you can find on vmware.com:
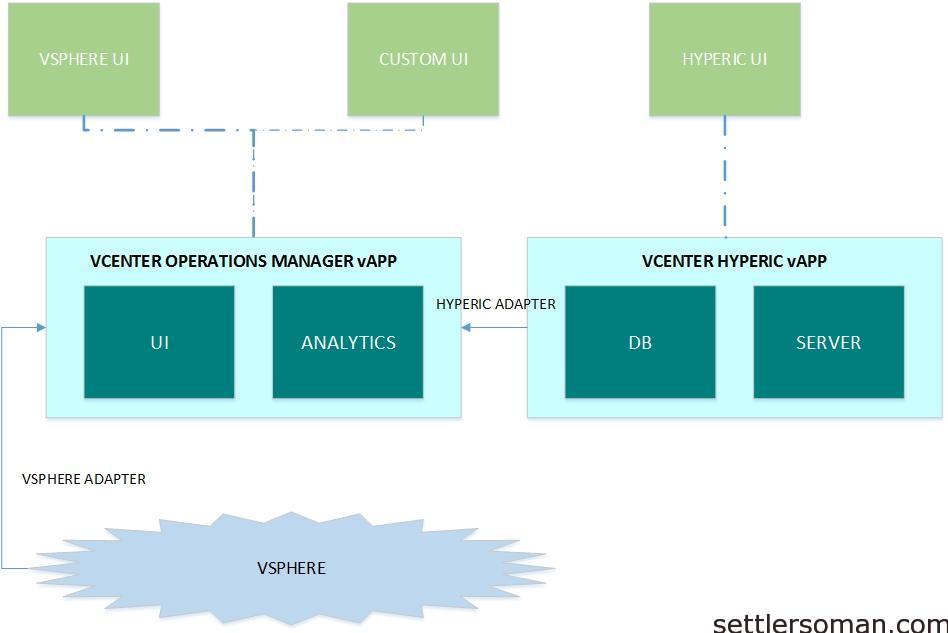
VMware vCenter Hyperic is a component of the VMware vCenter Operations Management Suite. It monitors operating systems, middleware and applications running in physical, virtual and cloud environments.
The architeture of vCenter Hyperic and integration with vCenter Operations Management is shown on the below diagram:
vCenter Hyperic is distributed as:
- virtual appliances (as vApp) - vCenter Hyperic Server + vPostgress DB
or
- installation packages for Windows or Linux (RPM) systems.
Of course, the easiest way to deploy vCenter Hyperic Server is vCenter Hyperic vApp. In this article I will show this way of deployment.
You need to download the following file from vmware.com:

To deploy vCenter Hyperic Server, please follow the steps:
- Log in to Web Client as administrator.
- Right click on datacenter > Deploy OVF Template.
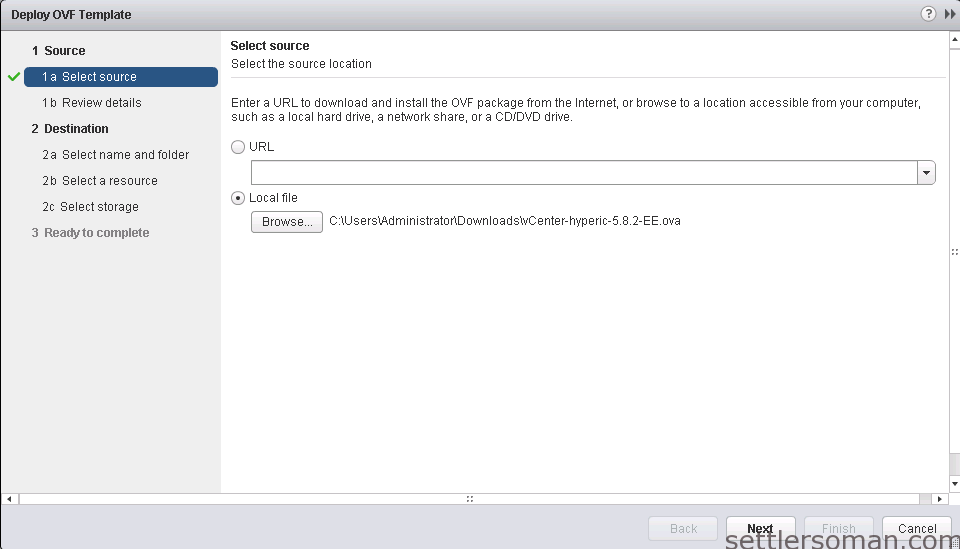
- The Deploy OVF Template wizard opens.
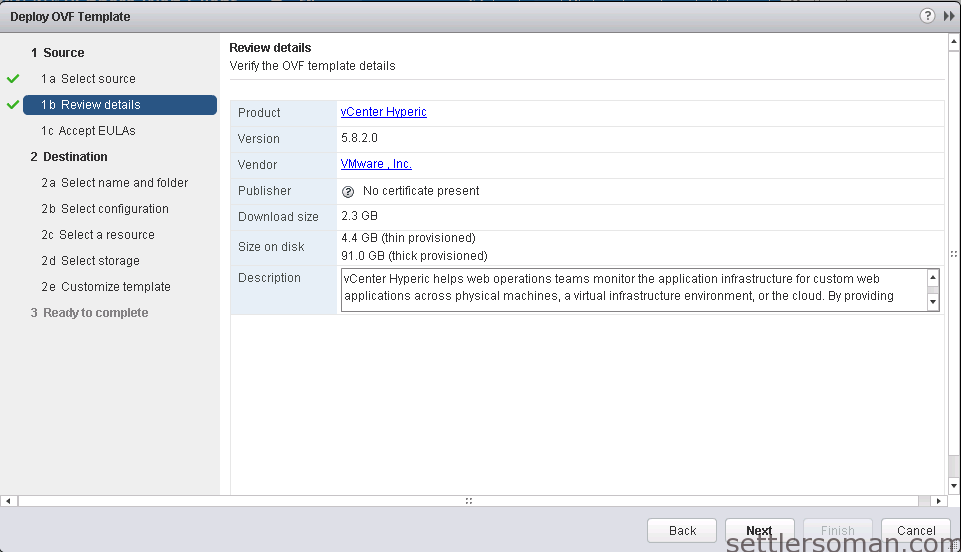
- Proceed through the pages of the wizard, entering appropriate values such as:
- DB Username (hqadmin by default) and DB password
- Hyperic admin username (hqadmin by default) and password
- Hyperic Server Network IP Address
- vPostgress DB Network IP Address
- Review the values that you have specified in the Ready to Complete page and optionally select Power on after deploymentto start the server when the deployment process completes.
- Click Finish.
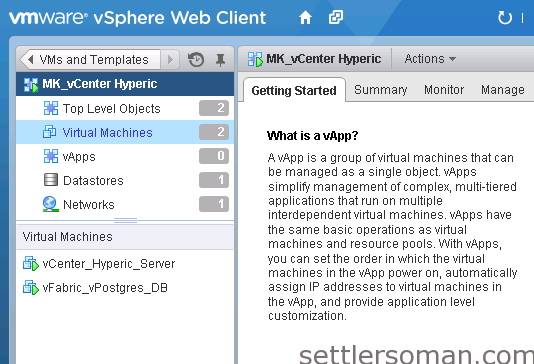
Deployed vCenter Hyperic vApp:
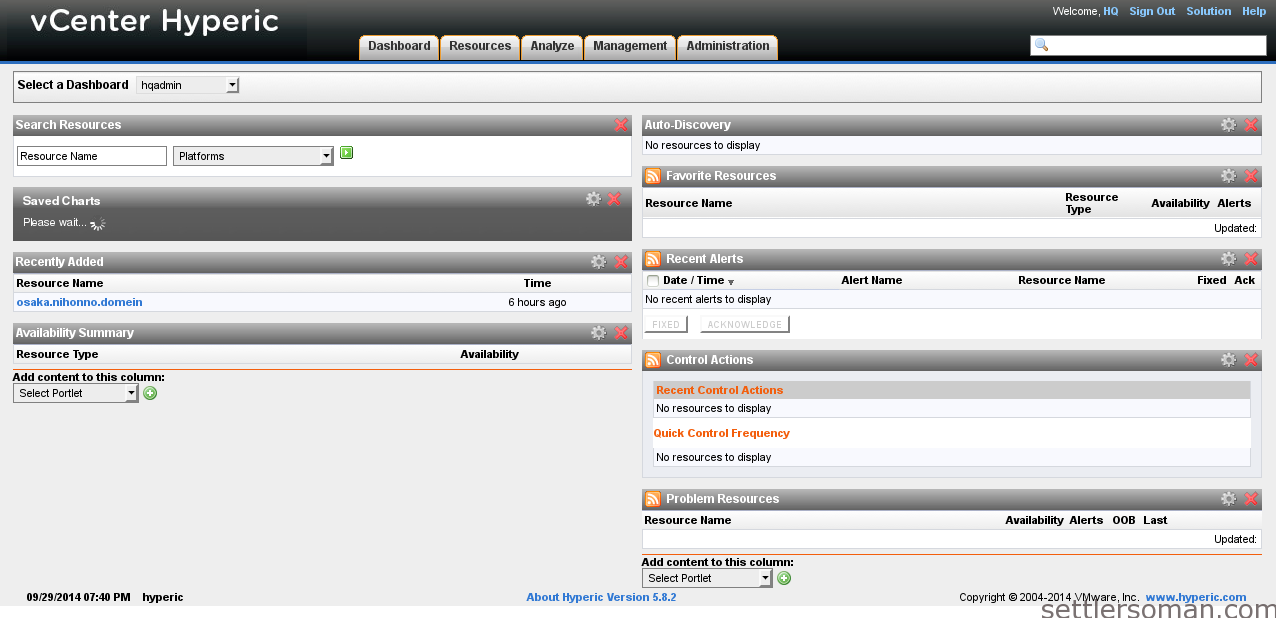
Hyperis UI (available on https://address_IP:7443):
Note: If this is the first vApp in your vCenter, you have to create IP Pool:
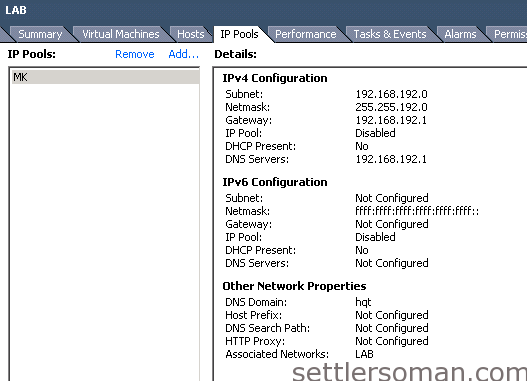 To create IP pool:
- In the inventory, select the datacenter that contains the vApp.
- In the IP Pools tab, right-click the IP pool that you want to edit and select Properties.
- If no IP pools appear, click Add to add a new IP pool.
- In the Properties dialog box, select the IPv4 or the IPv6 tab, depending on your IP protocol.
- Enter the IP Subnet and Gateway in their respective fields.
(Optional) Select the Enable IP Pool check box. - Enable this setting to specify an IP address range.
- Click OK.