This post covers how to deploy the vCenter Server Appliance with an Embedded Platform Services Controller. Why Appliance? Because as I mentioned here, the vCenter appliance is the future! Fortunately, it was released a tool which you can use to migrate vCenter from Windows Machine to the Appliance. For more information please follow my another post here.
There are some posts about vCenter 6.0 and Platform Services Controllers as follow:
- VMware vCenter 6 Deployment Possibilities: Topologies and High Availability
- How to configure Highly Available External Platform Services Controller (PSC) Appliance?
- vCenter Host Gateway Appliance – Overview and Deployment.
vCenter Server 6 Appliance Prerequisites
- Verify that your system meets the minimum software and hardware requirements: ESXi 5.1.x or later; depends on size of infrastructure: 2-32GB RAM, 2-16vCPU, 120GB-450GB available space on datastore).
- Verify that the ESXi host on which you deploy the vCenter Server Appliance is not in lockdown or maintenance mode.
- If you plan to use NTP servers for time synchronization, make sure that the time between the NTP servers and the ESXi host is synchronized.
- Create a DNS record for vCenter Appliance before starting steps 4-20.
To deploy the vCenter Server Appliance with an Embedded Platform Services Controller please follow steps:
- Download the vCenter Server Appliance installer (.ISO) from the VMware Web site at https://my.vmware.com/web/vmware/downloads.

- Mount the ISO image to the Windows virtual machine or physical server on which you want to install the Client Integration Plug-In to deploy or upgrade the vCenter Server Appliance.
- In the software installer directory, navigate to the vcsa directory and double-click VMware-ClientIntegrationPlugin-6.0.0.exe to install the plugin.
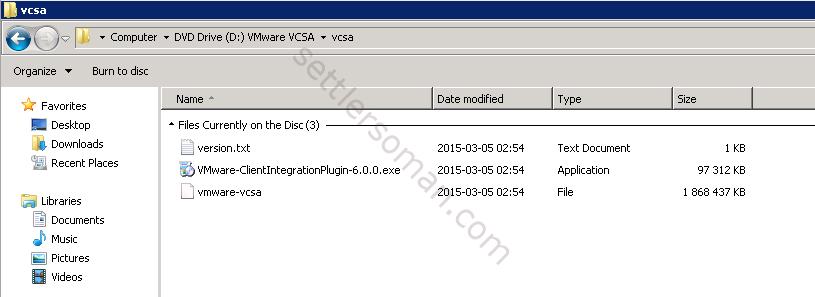
- In the software installer directory, double-click vcsa-setup.html.
- Wait up to three seconds for the browser to detect the Client Integration Plug-in and allow the plug-in to run on the browser when prompted.
- On the Home page, click Install to start the vCenter Server Appliance deployment wizard.
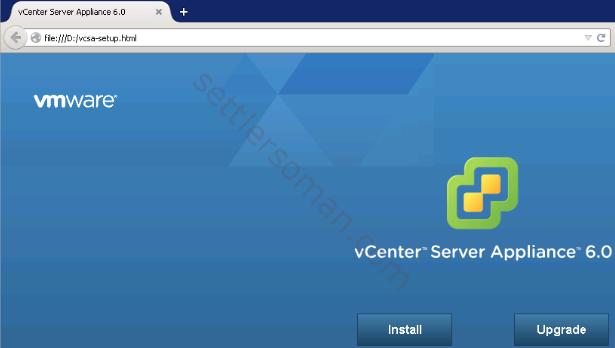
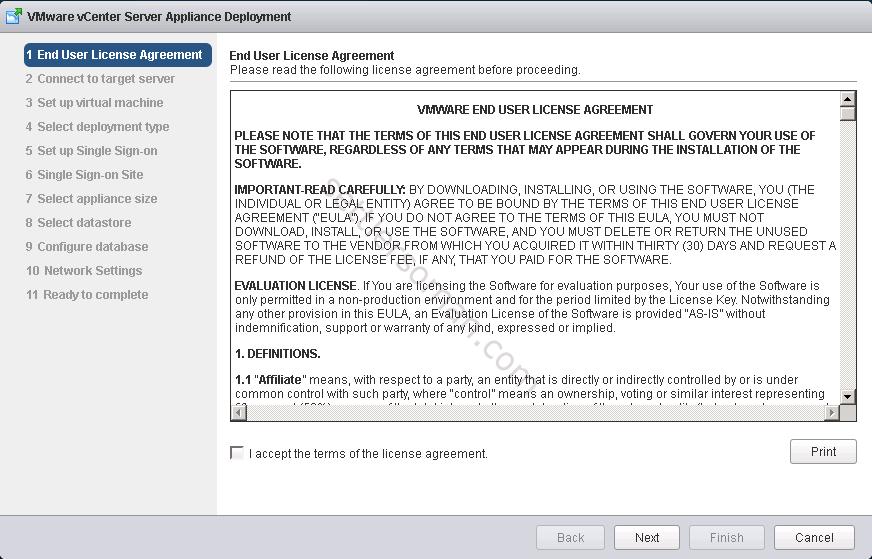
- Read and accept the license agreement, and click Next.
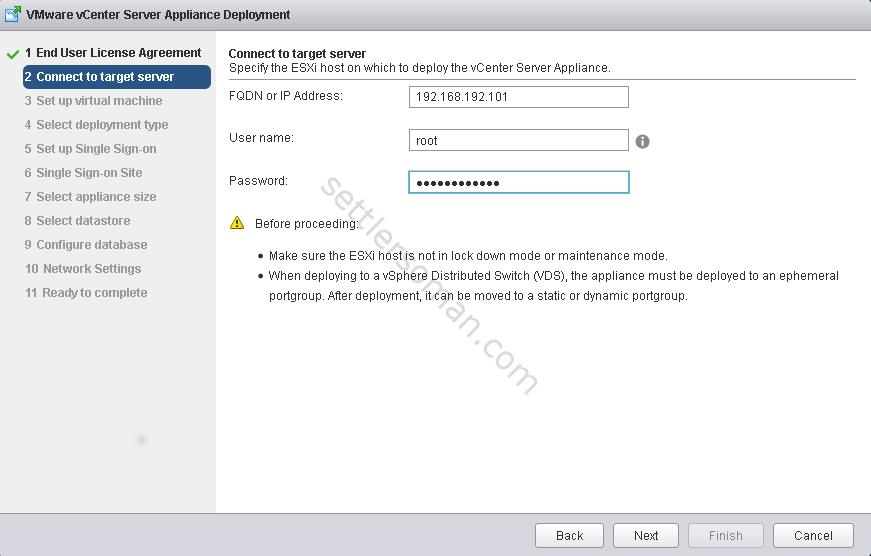
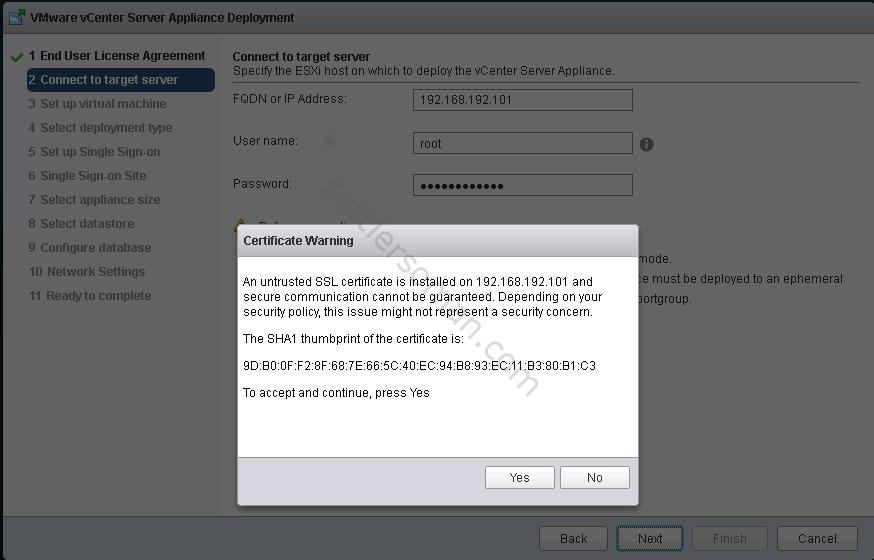
- Connect to the target ESXi host on which you want to deploy the vCenter Server Appliance and click Next.
- Accept the certificate warning, if any, by clicking Yes.
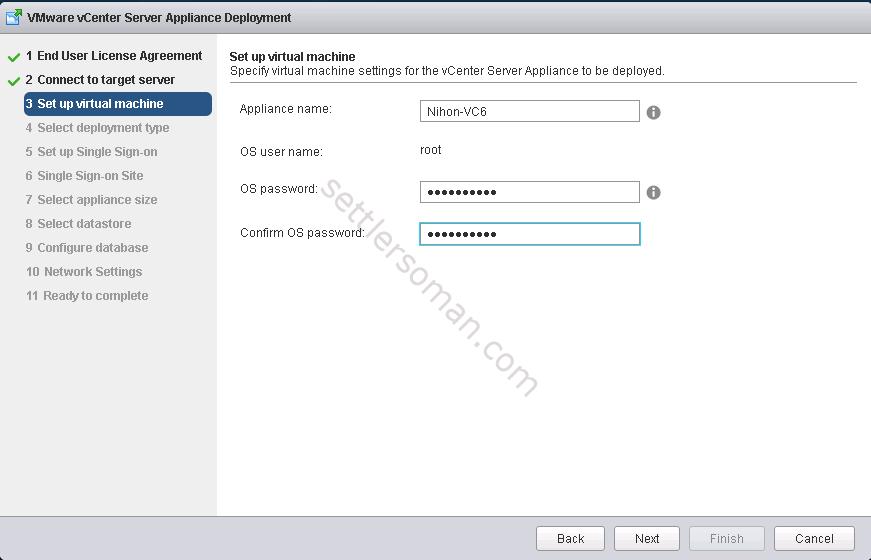
- On the Setup virtual machine page, enter the vCenter Server Appliance name, set the password for the root user, and click Next.
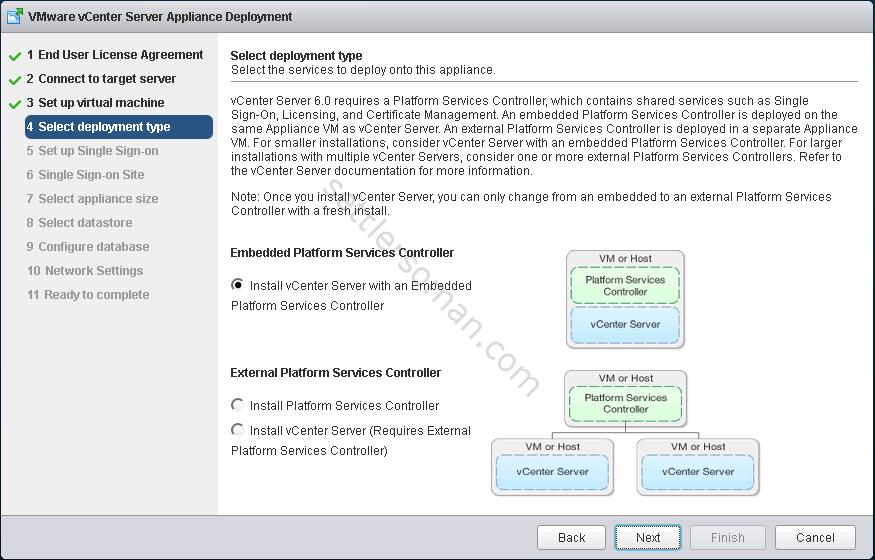
- In the Select deployment type page, select Install vCenter Server with an embedded Platform Services Controller and click Next.
- Create a new vCenter Single Sign-On domain or join an existing domain. I create a new SSO domain so I typed my SSO Domain name as "nihonno.domein".
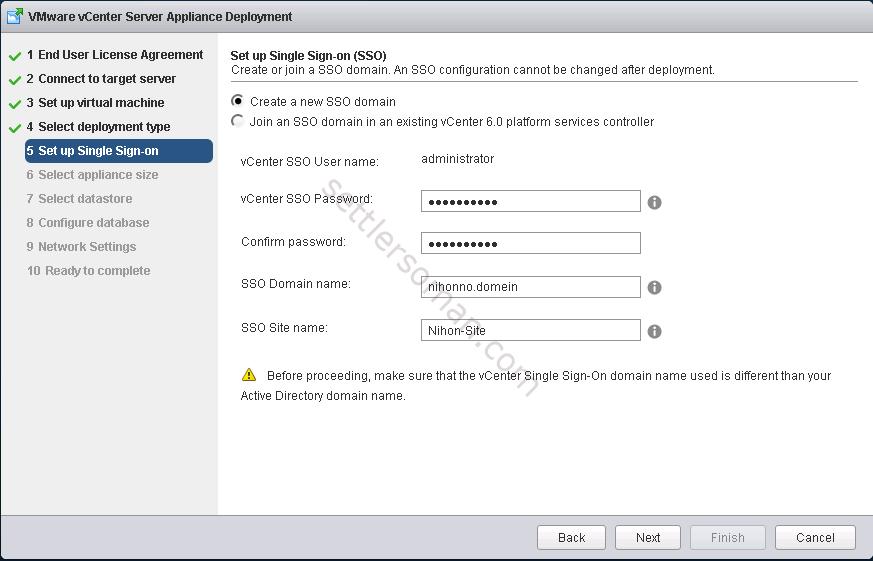
- Click Next.
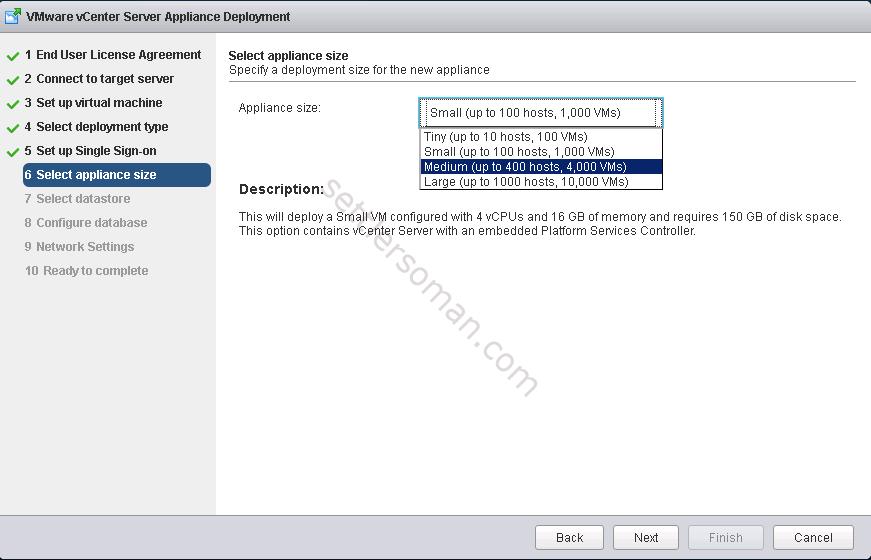
- In the Select appliance size page of the wizard, select the vCenter Server Appliance size for your vSphere inventory, and click Next.
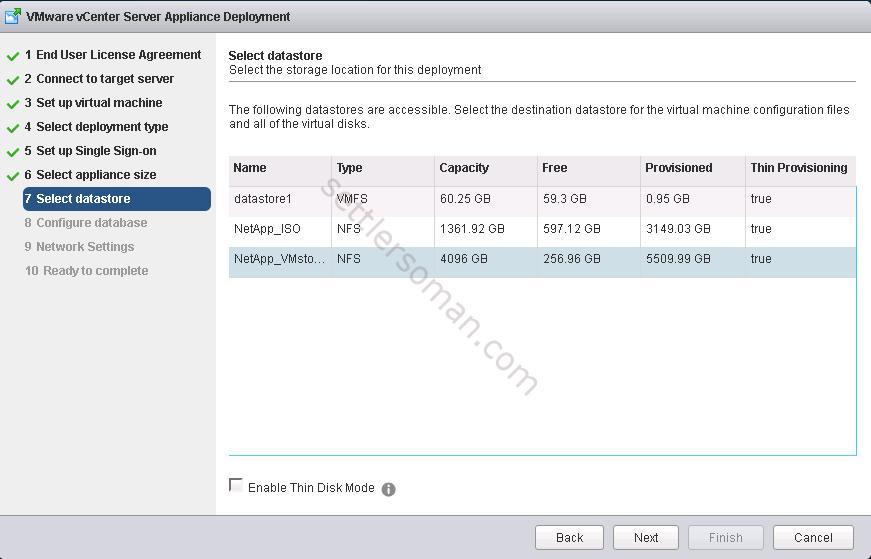
- From the list of available datastores, select the location where all the virtual machine configuration files and virtual disks will be stored and, optionally, enable thin provisioning by selecting Enable Thin Disk Mode.
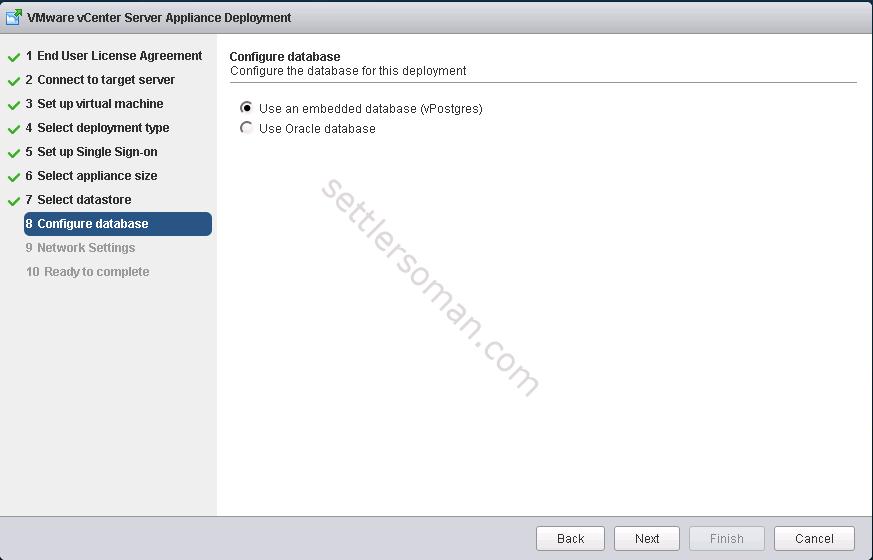
- Select the type of database that you want to use and click Next.
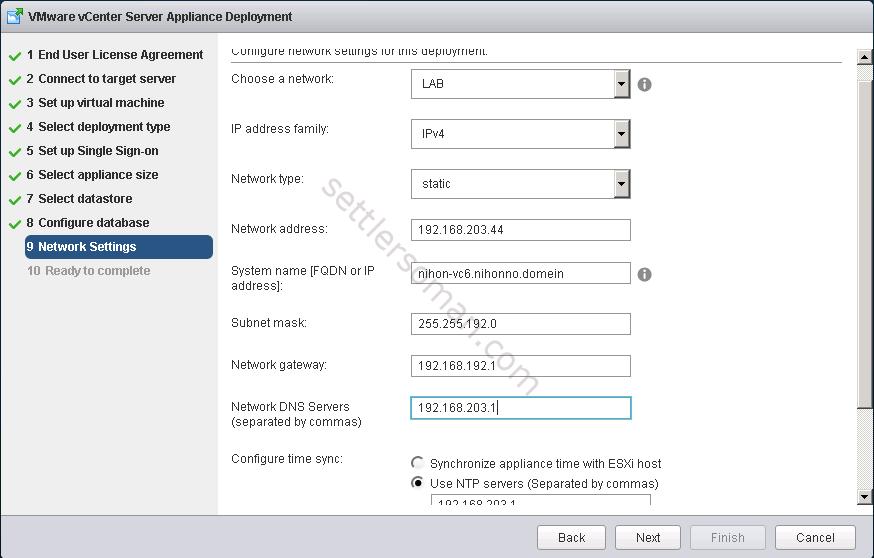
- On the Network Settings page, set up the network settings. Configure the time settings in the appliance, optionally select Enable SSH to secure the connection, and click Next.
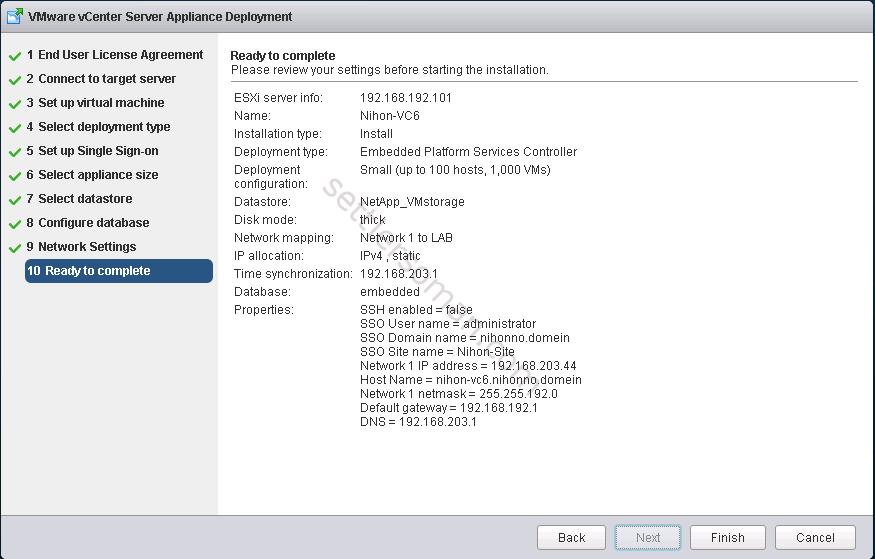
- In the Ready to complete page, review the deployment settings for the vCenter Server Appliance, and click Finish to complete the deployment process.
- After the deployment completes, click the https://vcenter_server_appliance_IP_address/vsphere-client link to start the vSphere Web Client and log in to the vCenter Server instance in the vCenter Server Appliance.
- Click Close to exit the wizard.
Note: If you use the embedded VMware Postgres database with vCenter Server 6.0 and you uninstall vCenter Server, the uninstallation process removes the embedded database. More information available here.