Some days ago we discussed the prerequisites for provisioning VVOLs on NetApp Clustered Data ONTAP and vSphere 6. We have installed the NetApp Virtual Storage Console 6.0 and NetApp VASA 6.0. In this post we will see how VVOLs work in practice:
- create a Storage Capability Profile (SCP)
- provision a VVOL datastore
- some tests of VVOLs
Creating a Storage Capability Profile (SCP)
Before provisioning VVOLs on NetApp we need to create a Storage Capability Profiles (SCPs) following the below steps:
- From the Web Client home page, click Virtual Storage Console --> VASA Provider for clustered Data ONTAP --> Storage Capability Profiles.
- Click the new VM Storage Policy icon shown on the below figure.

- Enter the VM Storage Policy name then click Next.
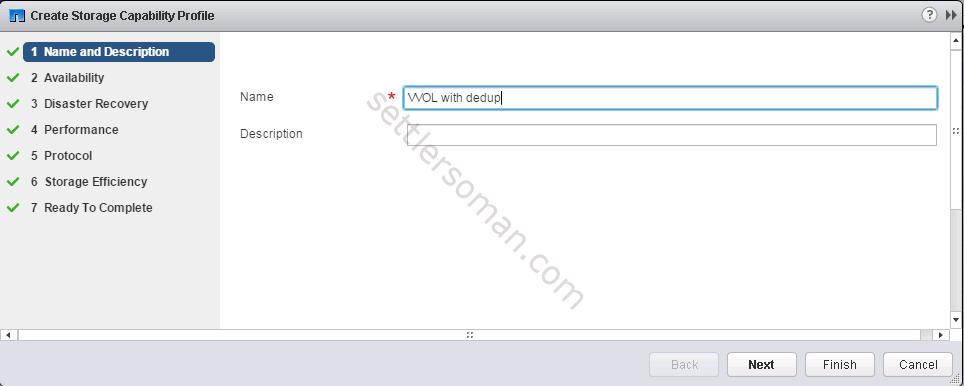
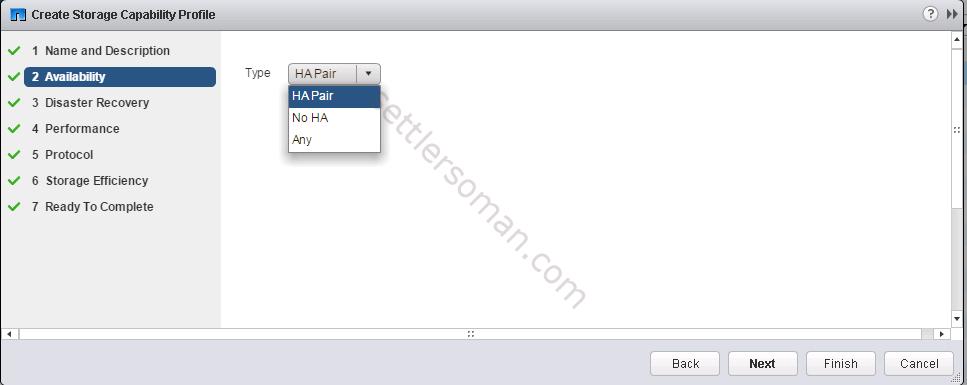
- Select the Availability capability (available: HA Pair, No HA or Any). Then click Next.
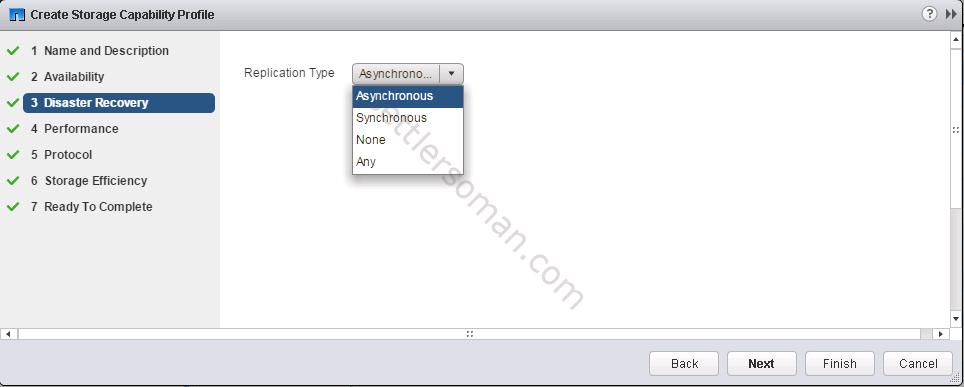
- Select the Disaster Recovery capability (available: Asynchronous, Synchronous, None or Any). Then click Next.
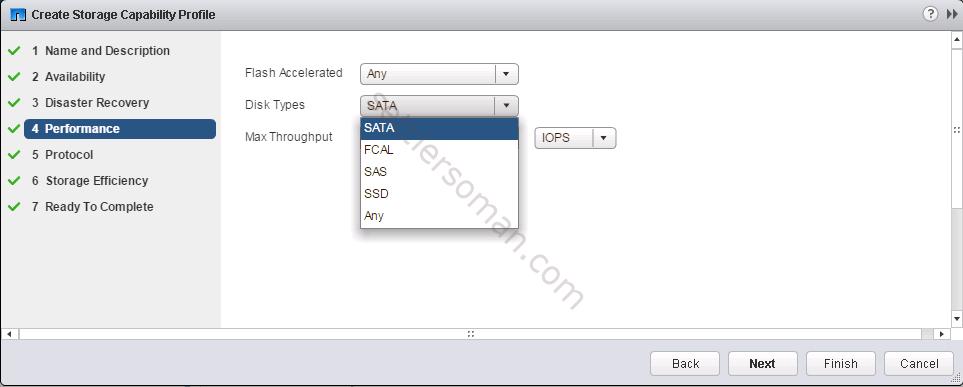
- Select the Performance capability (such as Disk Types, Max Throughput). Then click Next.
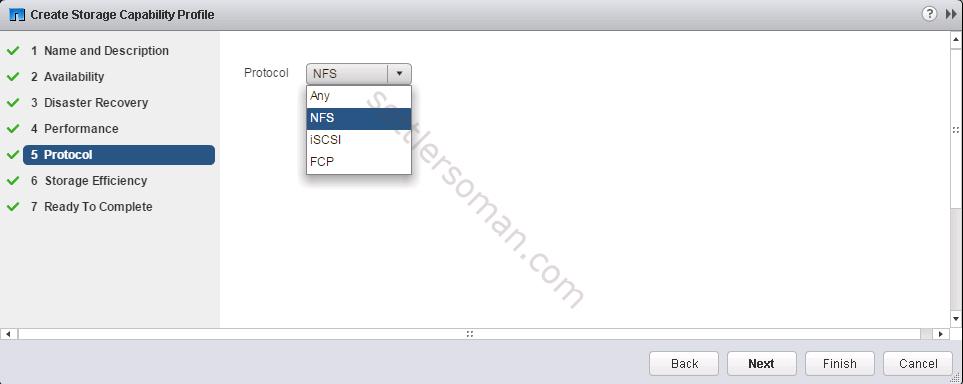
- Select Protocol (NFS, iSCSI, FCP or Any). Then click Next.
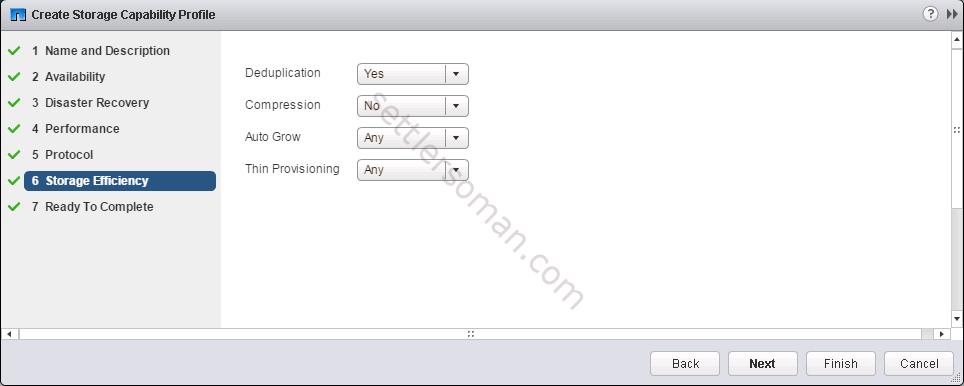
- Select the Storage Efficiency capability (Deduplication, Compression, Auto Grow or Thin Provisioning). Then click Next.
- Review settings of a new Storage Capability Profile and then click Finish.
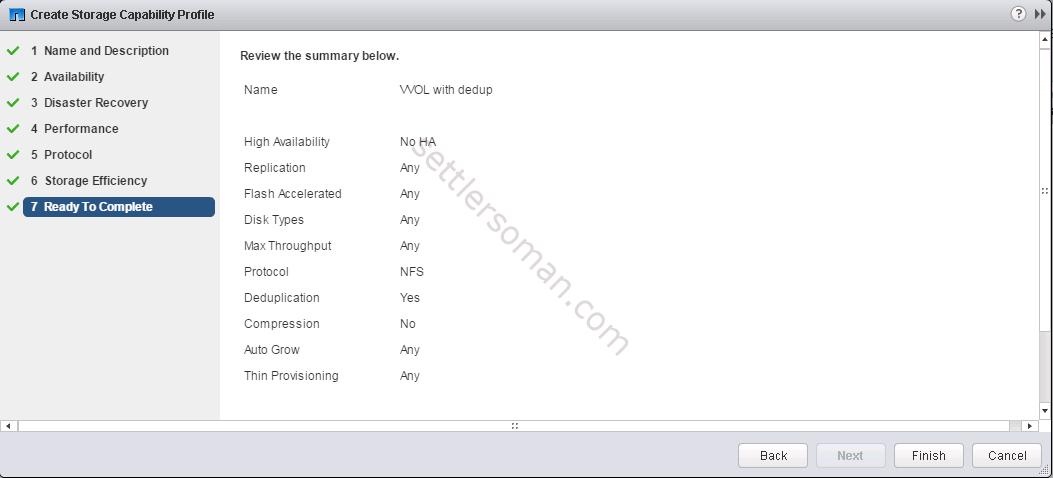
We have just created a new Storage Capability Profile.
Provisioning/creating a VVOL datastore
To provision (create) a VVOL datastore please follow the below steps:
- From the Web Client home page, right click on ESXi host or cluster and select VASA Provider for clustered Data ONTAP --> Provision VVOL Datastore.

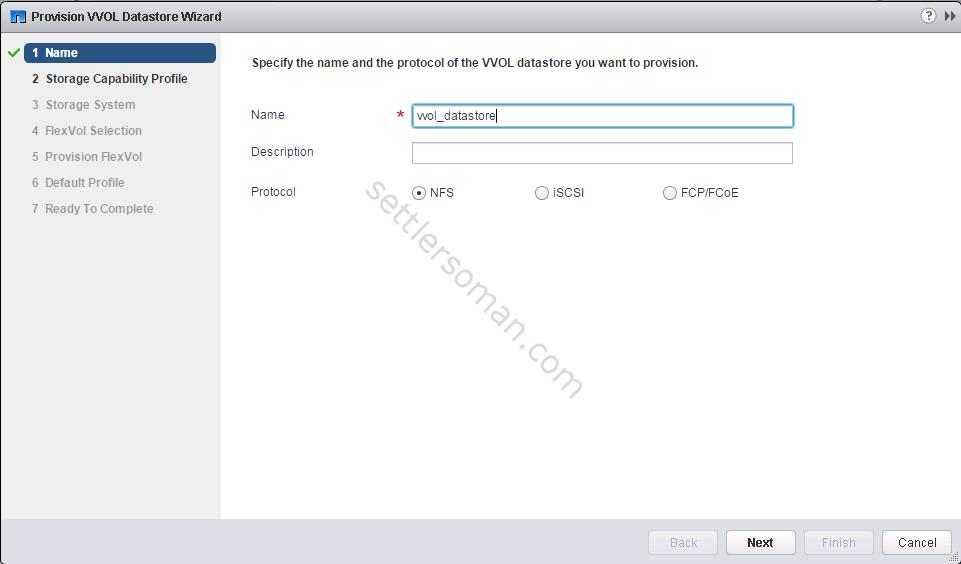
- Enter the VVOL datastore name, select a protocol then click Next.
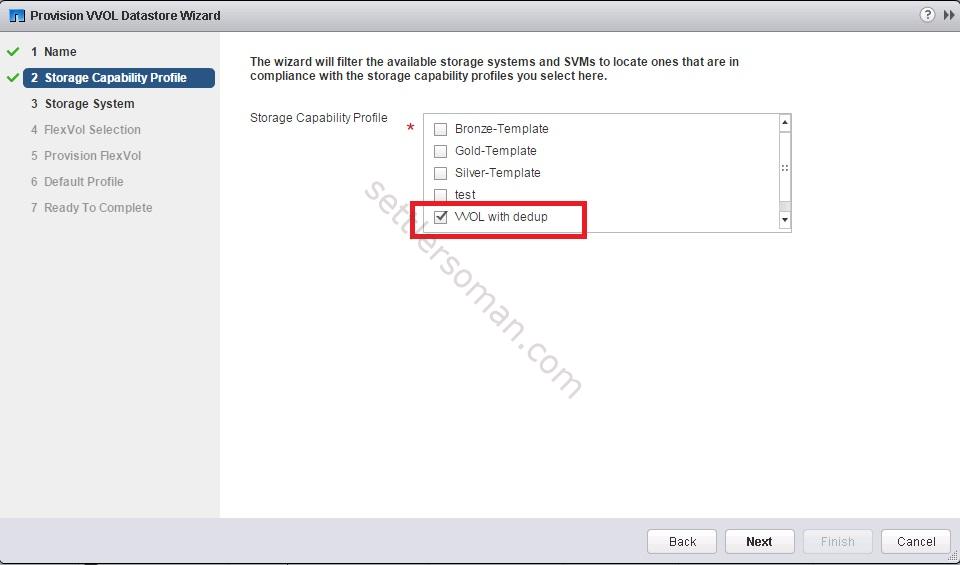
- Select one or more SCPs then click Next.
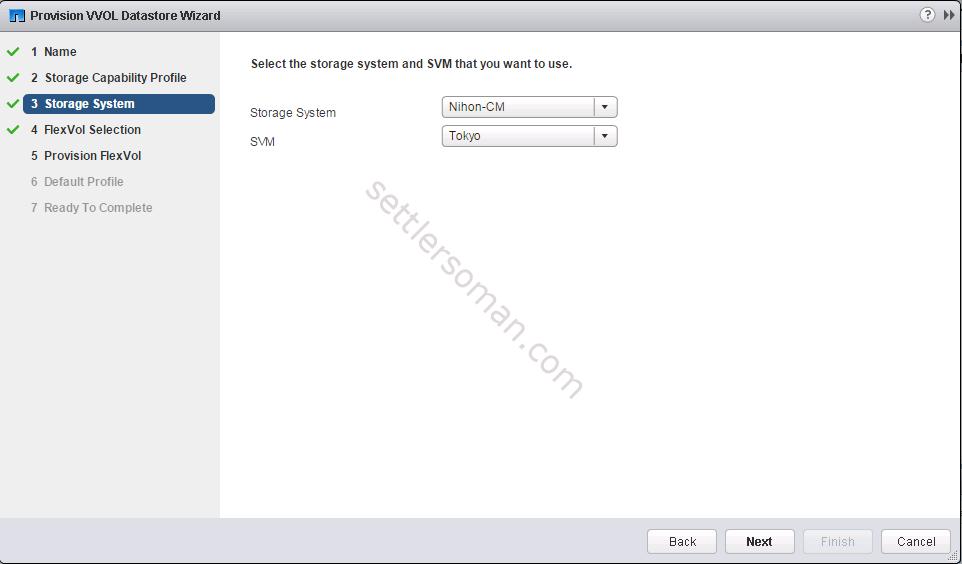
- If you have some NetApp clusters (Storage Systems) and SVMs - please select a correct one, then click Next.
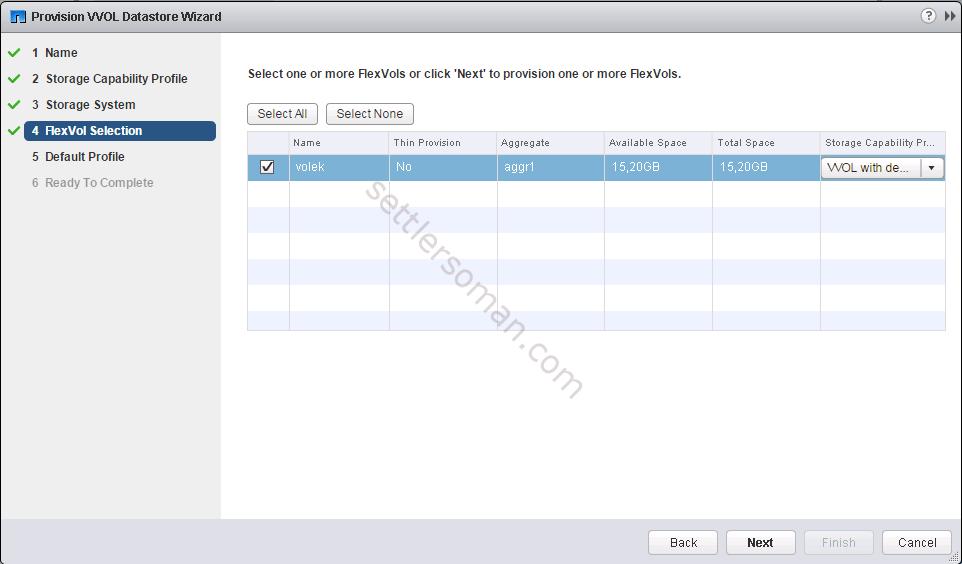
- Select the FlexVol, then click Next.
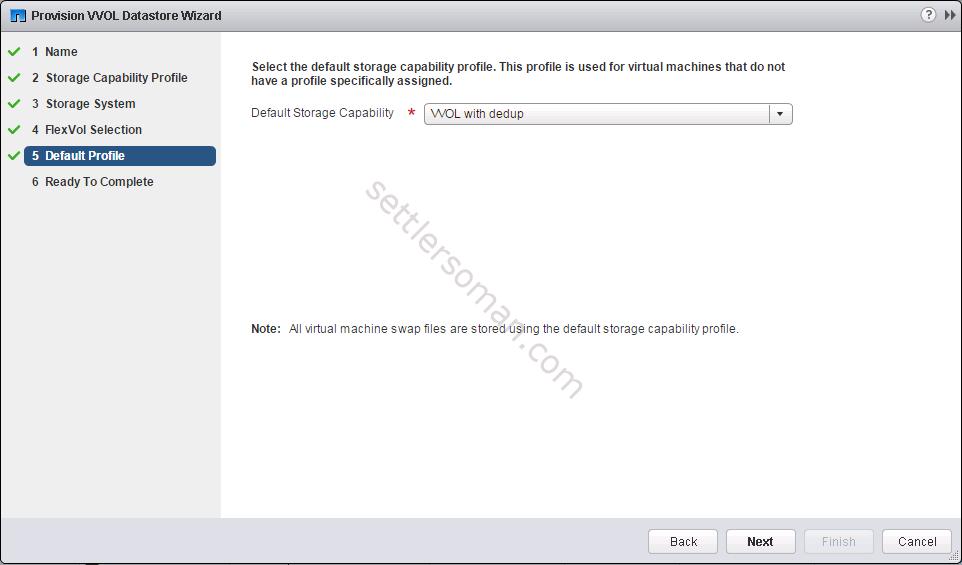
- Select the Default Storage Capability (used for virtual machines that do not have a profile specifically assigned) then click Next.
- Review the settings for the VVol datastore then click Finish.
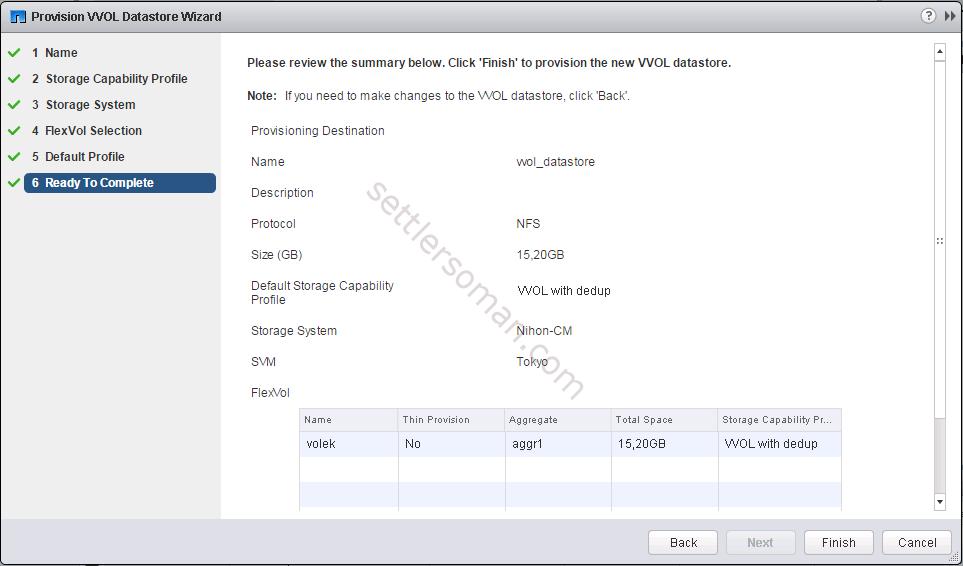
- Voilà! VVOL datastore created successfully 🙂

We have provisioned the first VVOL datastore! Looks normal, as a standard vSphere datastore 😉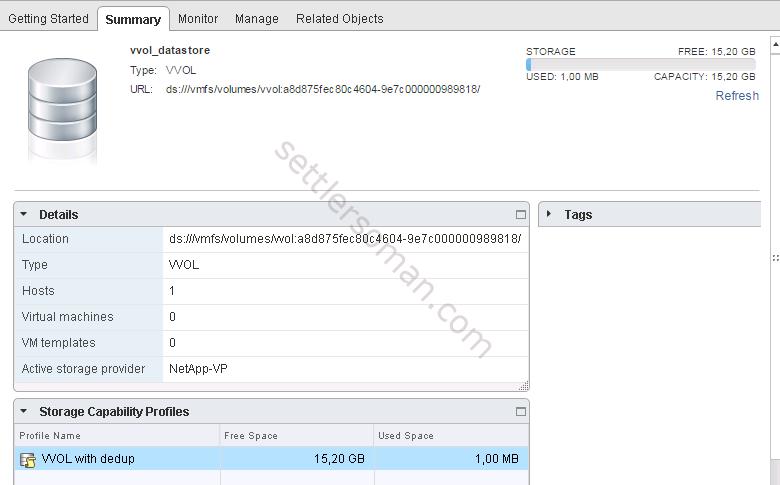
Testing of VVOLs
Let's do some tests now. As I described in What's new in vSphere 6: Virtual Volumes, VVOLs are created during VM management (for VM config, virtual disk, swap if needed, snapshot). Let's check how it works in practice!
When we go to our provisioned datastore (Related Objects --> Backing Storage), there are no VVOLs:
Let's create a virtual machine with one virtual disk. If we check again our VVOL datastore, we can notice that there are two VVOLs (config +disk):
Let's power on the VM. Now we can see three VVOLs (+swap):
Let's add the second virtual disk to the VM. Now four VVOLs (+disk):
and the last test, let's create a snapshot of VM. As we could guess, there are six VVOLs now: 🙂
There are some other options available for VVOL datastore as follows:
- Add Storage to VVOL Datastore (when we create a new volume on NetApp, we can add it to VVOL Datastore)
- Remove Storage from VVOL Datastore
- Edit VVOL Datastore
- Destroy VVOL Datastore
- Mount VVOL Datastore
Conclusion
VVOLs are really a cool feature! I hope that this post shows exactly how VVOLs work in practice! Maybe do you use VVOLs already? Any feedback is welcome!