In the previous post here I showed how to use NetBackup to backup/protect Microsoft SQL databases. This post covers restoration of SQL databases. There are two main possibilities:
- Restore a database at its original location.
- Restore a database to an alternative location.
Restoring database - original location
To restore a database at its original location please follow the below steps:
- From the Windows Start menu, select Programs --> Symantec NetBackup --> NetBackup Agents --> NetBackup MS SQL Client.
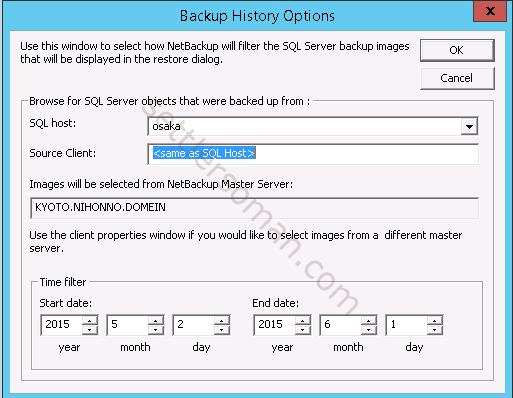
- Select time filter and click OK.
- Select File > Restore SQL Server objects.

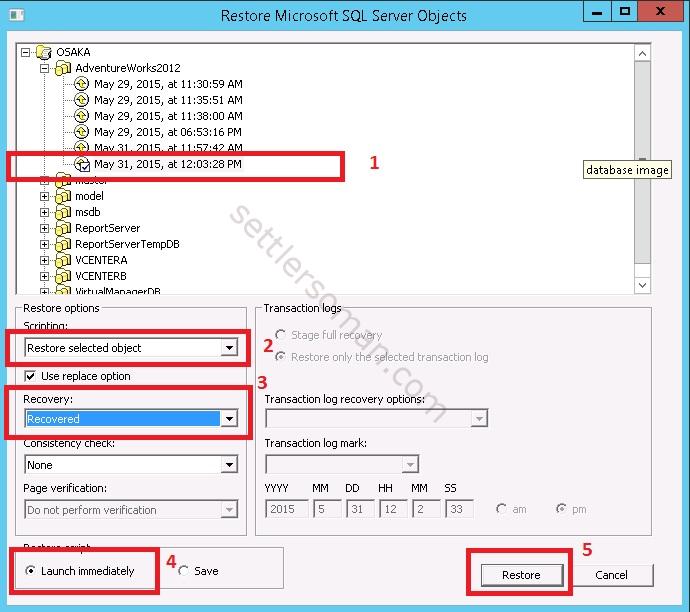
- In the Restore Microsoft SQL Server Objects dialog box, in the left pane, select the database instance and backup which you want to restore (1). Select Restore selected object (2), Recovery: Recovered (3) and Launch immediately (4) to restore now. Then click Restore (5) to start the process.
- Restore should be done successfully.

Restoring database - alternate location
To restore a database to alternate location please follow the below steps:
- From the Windows Start menu, select Programs --> Symantec NetBackup --> NetBackup Agents --> NetBackup MS SQL Client.
- Select time filter and click OK.
- Select File --> Restore SQL Server objects.
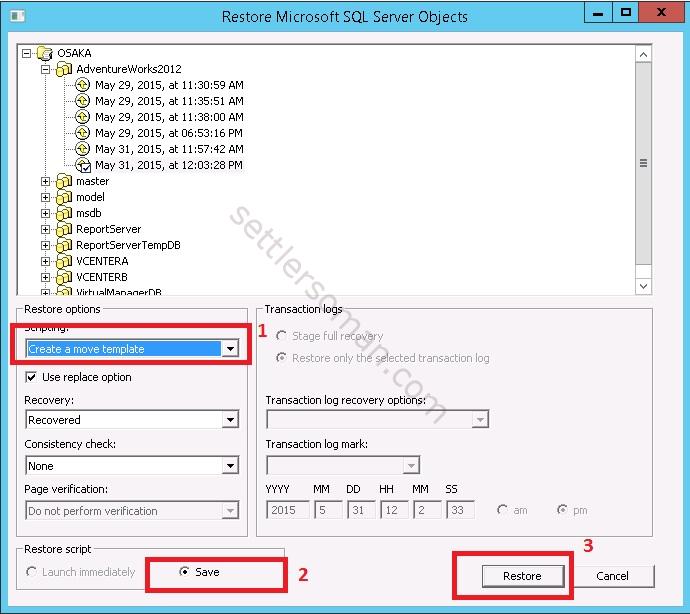
- In the Restore Microsoft SQL Server Objects dialog box, in the left pane, select the database instance and backup which you want to restore. Select Create a move template (1). Save button should be selected (2) and cilck Restore (3).
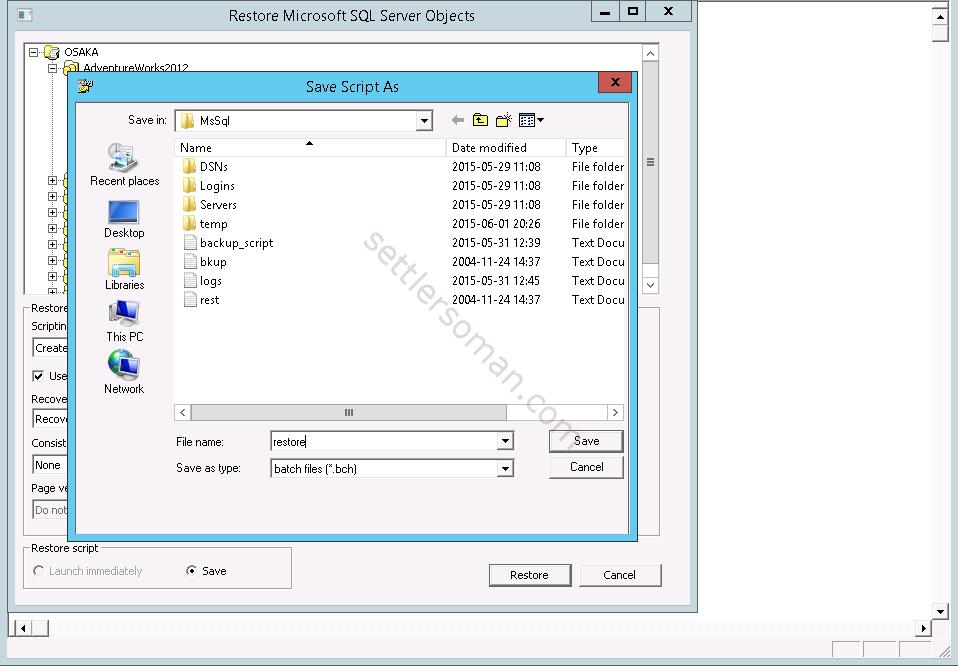
- Type a name of restore batch file.
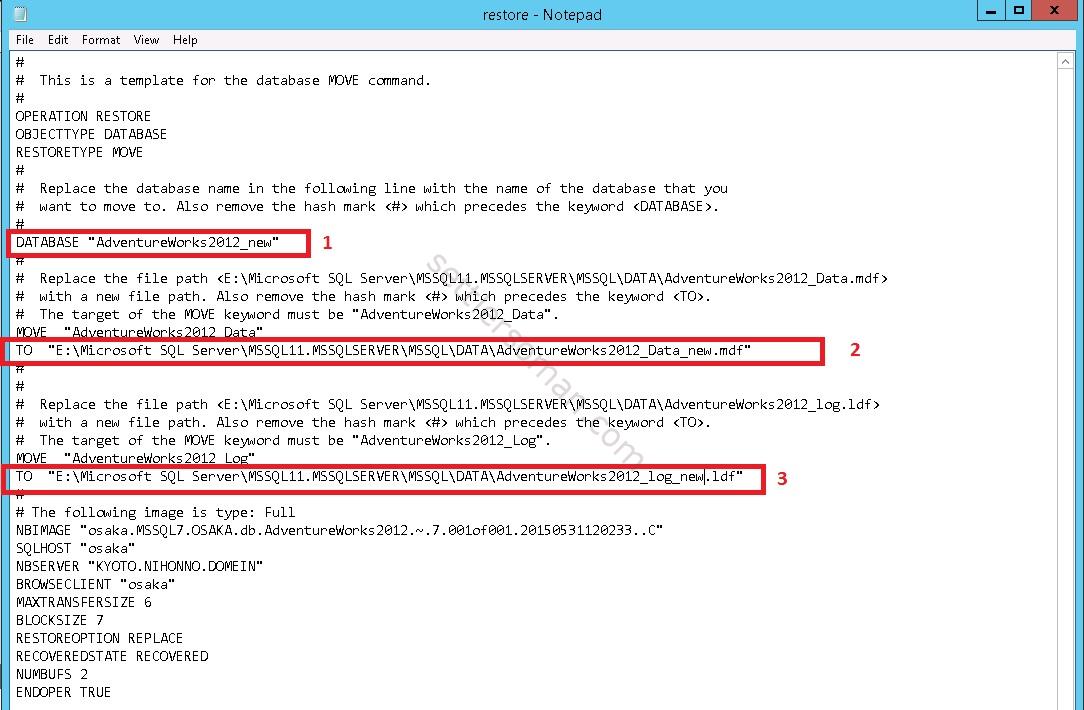
- Remove hash (#) and change a name for database (1), path of database (2) and log (3). Save the file.
- Select File --> Manage script files.

- Select the restore batch file and click Yes to start the restore process.

- The restore process should be done successfully.

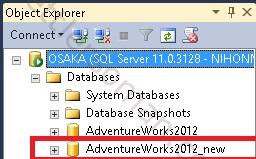
- When you log in to SQL Server using the SQL Management Studio, you should see the restored database.
NOTES: Above procedures are valid for NetBackup version up to 7.6.x. From NetBackup 7.7, backup/restore of Microsoft SQL has been changed.