As described here, NetBackup provides nice features to protect VMware. In the previous article here, I showed how to create a VMware policy in NetBackup. Therefore, in this article we discuss how to restore VMs because NetBackup provides an powerfull interface/tool to perform restores.
NetBackup supports the following scenarios:
- Restore the full VMware virtual machine
- Restore individual files of OS of virtual machine
- Restore SQL, Sharepoint or Exchange data from VMs
In this article we will focus on the first scenario - restore the full VMware virtual machine to original or alternate location because this is directly related to the NetBackup policy for VMware.
Restore the full VMware virtual machine to original location
To perform restore the full VMware virtual machine to the original location, please follow steps:
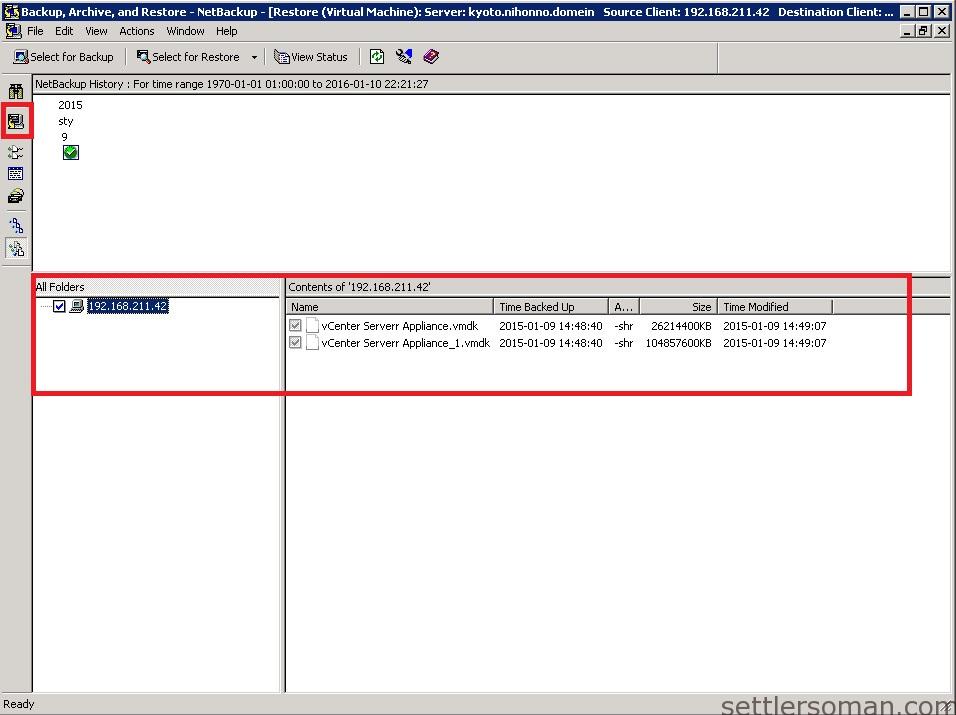
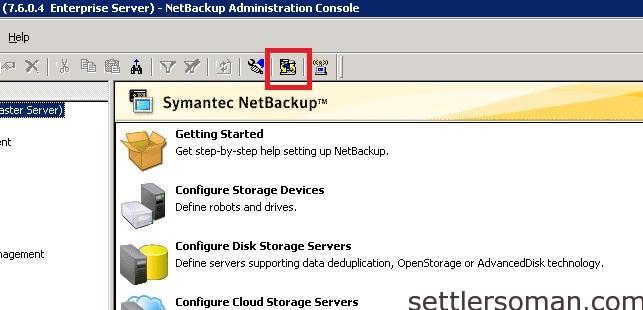
- Start the NetBackup Backup, Archive, and Restore interface (BAR). You can do it directly from the NetBackup Administration Console.
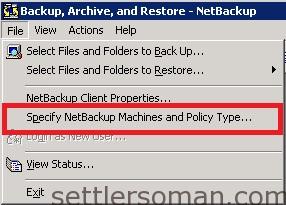
- Click Files > Specify NetBackup Machines and Policy Type.
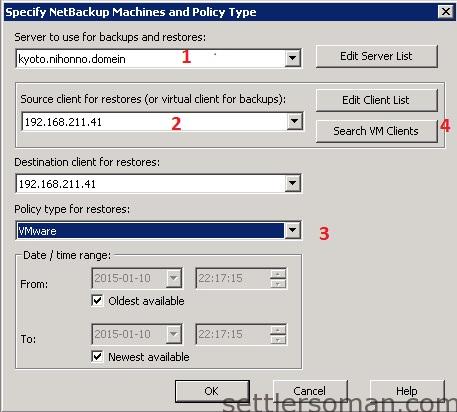
- Specify the NetBackup master server that directed the backup (1); The VMware virtual machine that was backed up (2); The type of policy that made the backup (3) and so on. Also you can search client (4). Then click OK.
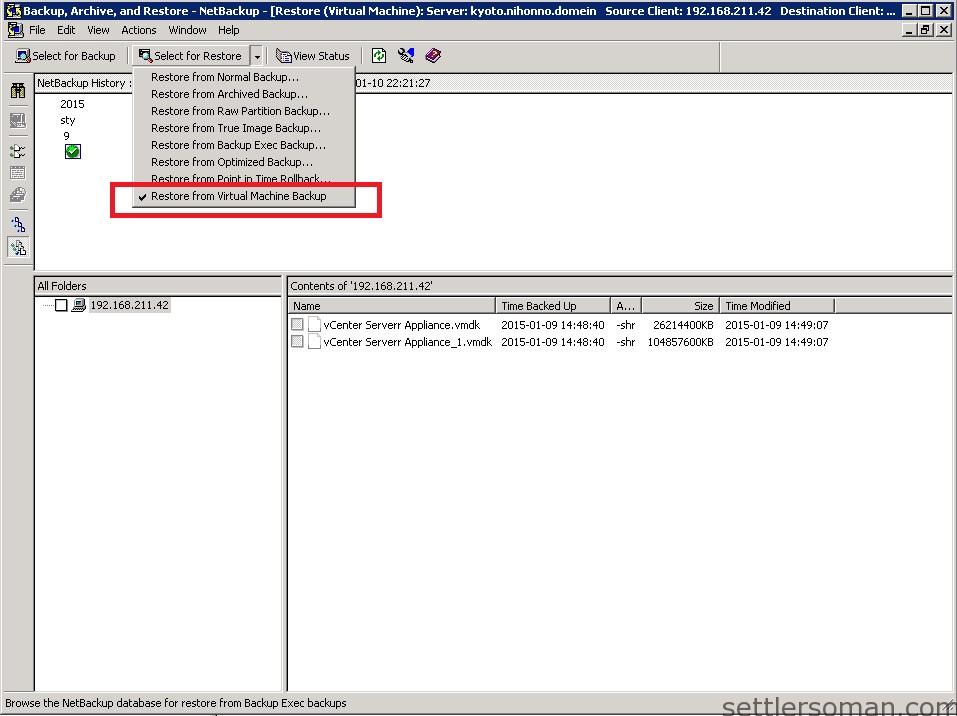
- Click the down arrow on the Select for Restore option. Select Restore from Virtual Machine Backup. A restore window displays the backups available for restore.
- Select Original location and click Next,
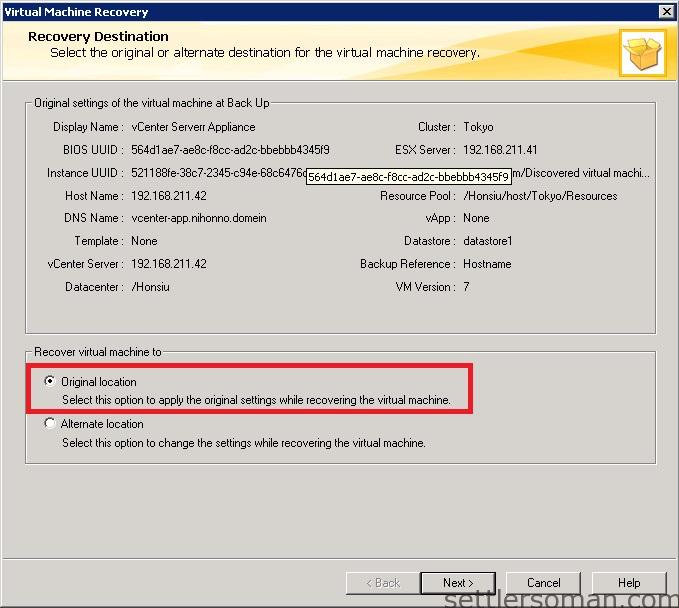
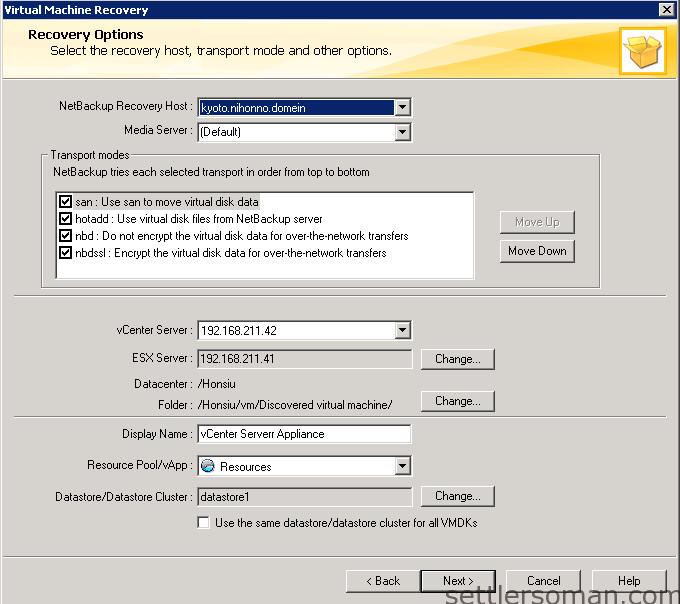
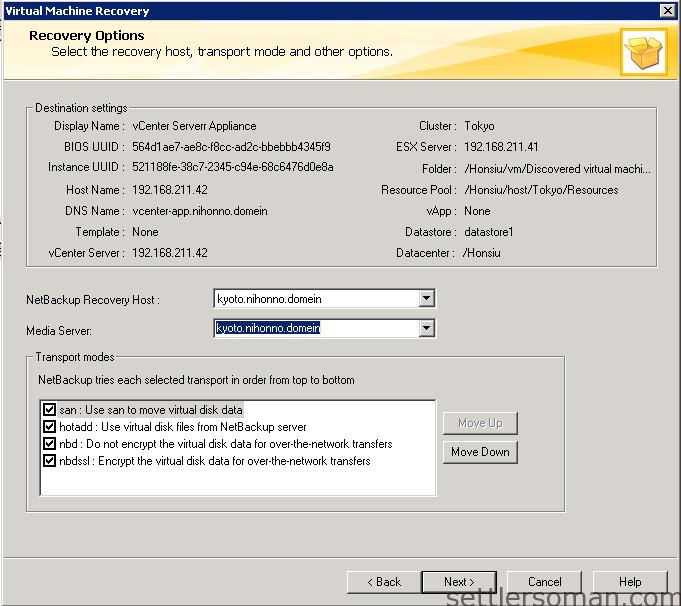
- NetBackup Recovery Host is the host that performs the recovery. The default is the host that performed the backup (the backup host). Select Transport modes which determines how the restore data is sent from the recovery host to the VMware datastore. The default is the type that the backup used. Click Next.
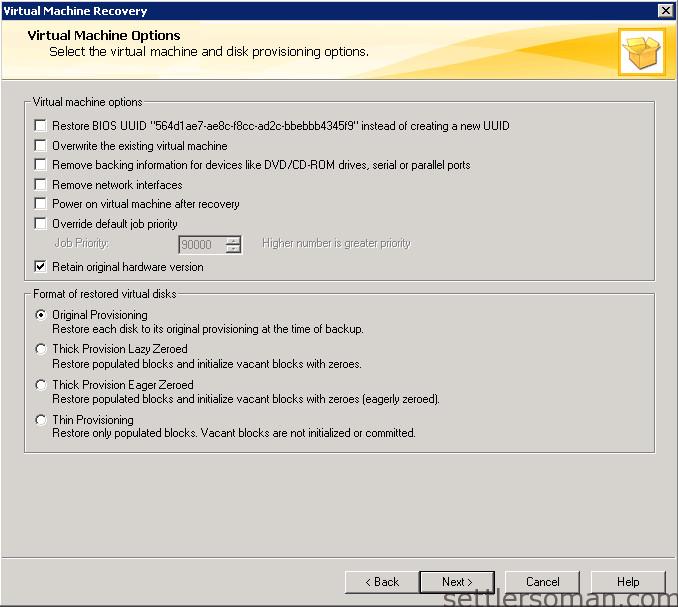
- Select Virtual Machine Options. Click Next.
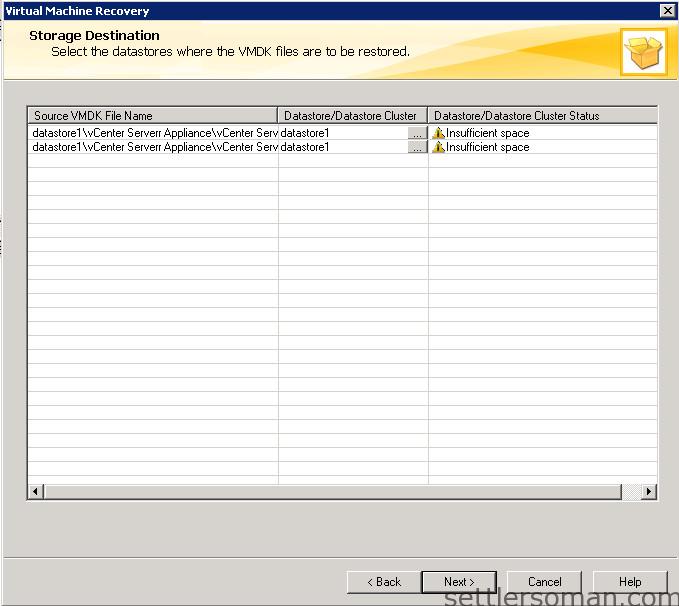
- Click Run Pre-Recovery Check to verify credentials, available space on the datastore, and other important requirements.
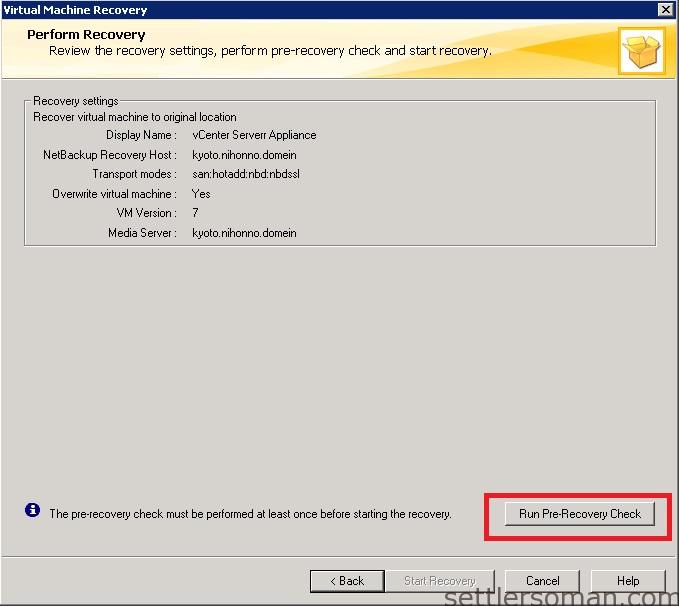
- If no important error you will able to Start Recovery.
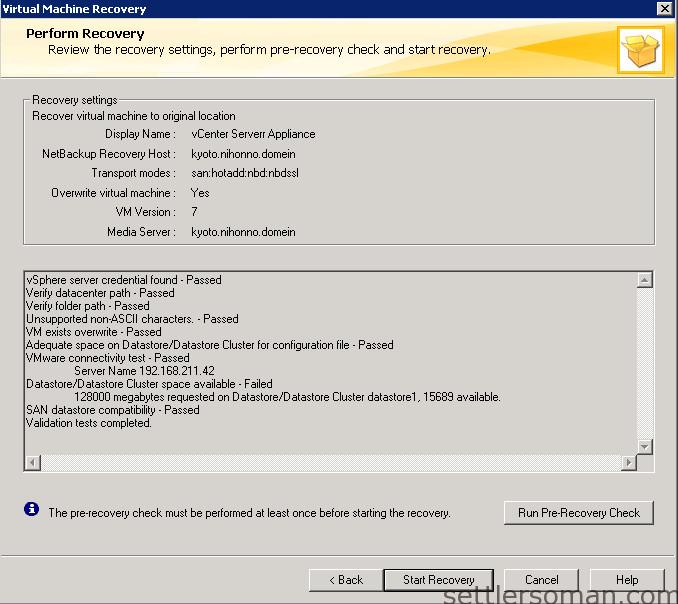
Restore the full VMware virtual machine to alternate location
To perform restore the full VMware virtual machine to alternate location, please follow steps:
- Please follow steps mentioned earlier in 1-5 (as restore to original location).
- Select Alternate location. Click Next.
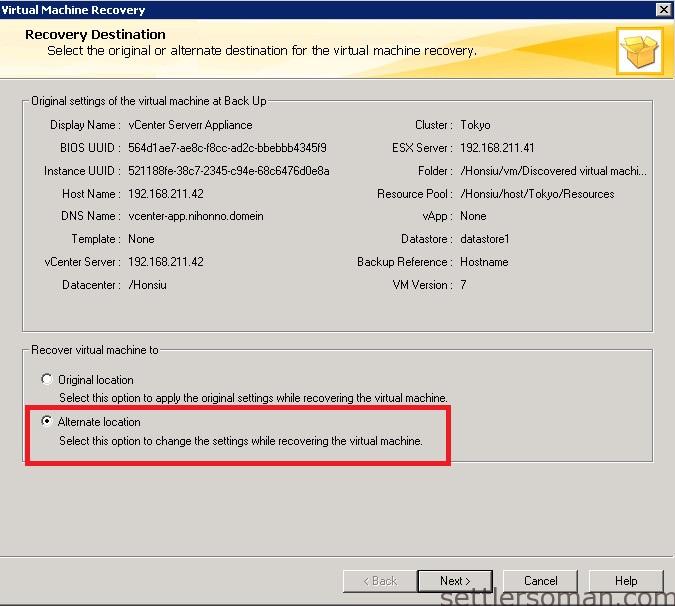
-
The Recovery Options dialog initially displays the original virtual machine settings that were recorded in the NetBackup catalog when the virtual machine was backed up.
- Select Vitual Machine Options. Click Next.

-
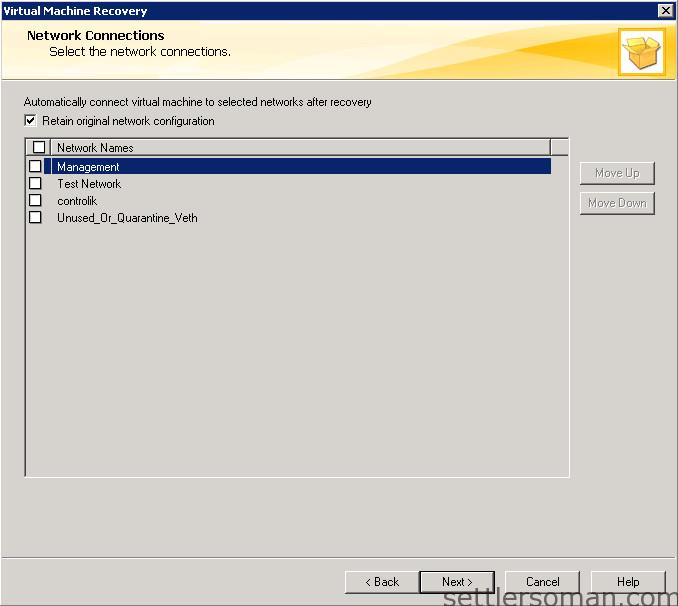
For restore into vSphere, this dialog displays all of the networks that the restored virtual machine can connect to. Please select the correct network or retain original network configuration. Click Next.
- Click Run Pre-Recovery Check to verify credentials, available space on the datastore, and other important requirements. If no important error you will able to Start Recovery.
